How to Reconcile Nominal Accounts in Sage 200 using Excelerator
Do you ever need to reconcile nominal accounts in Sage 200? Sage does not do this, but luckily Excelerator comes to the rescue. You can use this to reconcile:
- Large volumes of online transactions against receipts from credit card companies,
- Payroll expenses against payments, or
- Any other control account.
View a video of this tutorial here:
We begin by logging in. Let us use the pre-built Nominal Reconciliation template that comes with Excelerator.
Right-click and browse “Account Reference.”
and choose the nominal code to reconcile.
Choose New for a new nominal reconciliation or choose Adjust to adjust an existing reconciled session. In this tutorial, we will choose New.
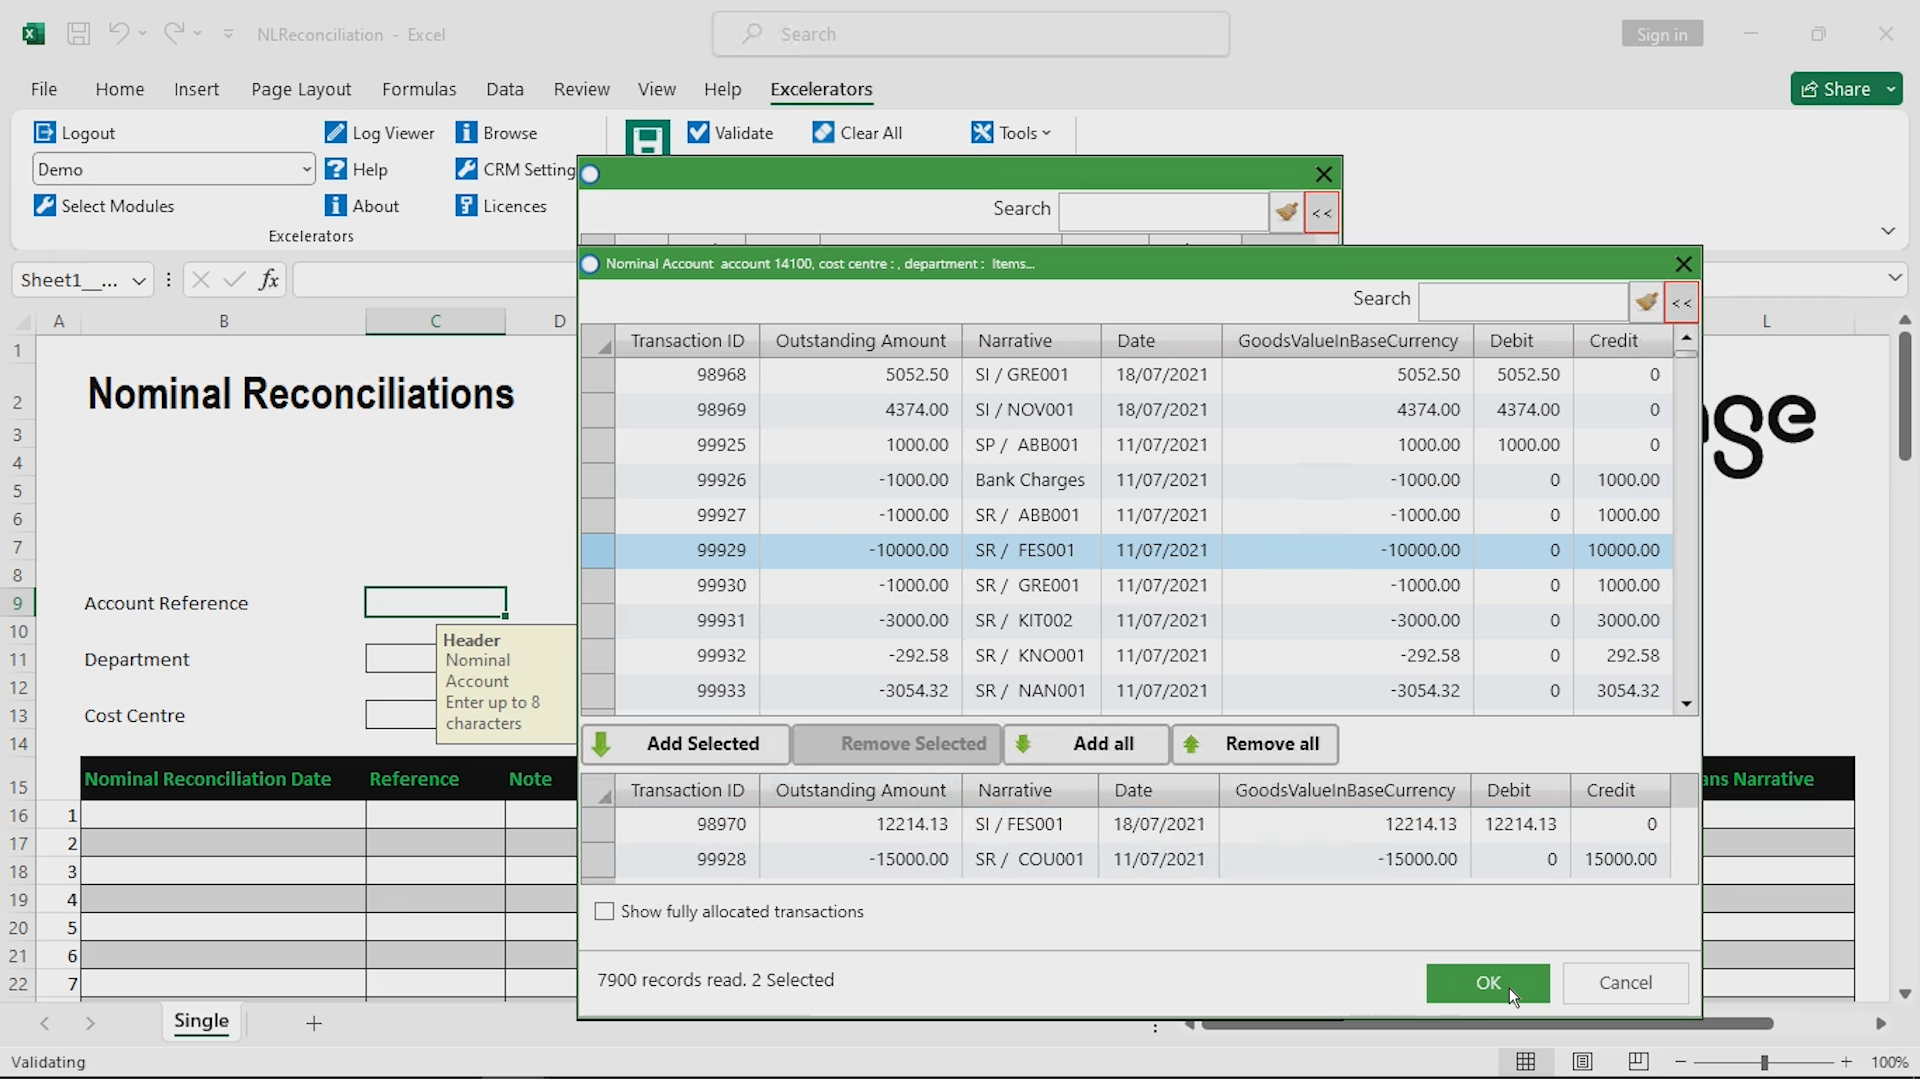
Now select the transactions to be reconciled, click “Add Selected”, and then click “Ok”.
The transactions have been downloaded to the spreadsheet.
With Excelerator, reconciling nominal transactions is a piece of cake. Highlight the Allocated Amount of the transactions to be allocated, right-click and then choose Allocate. Just like that, they have been allocated against each other.
Ensure that the sum of the allocated amount is zero. If it is not, then adjust the amounts accordingly.
Click Validate to validate your data, and then click Save to sage, and it is done. You have successfully reconciled your nominal transactions.
Now let’s use the spreadsheet designer to create a custom template. Click the Designer button. In the designer, all standard Sage fields are available. Enter the number of rows needed.
We will add the Account Reference, Department, Cost centre, Session ID, User, Nominal Reconciliation Date, Reference Transaction ID, Outstanding Amount, Debit, Credit, Allocated Amount, Source, Transaction Date, and Transaction Narrative.
Our template is now ready to go. Let’s adjust an earlier allocation. Start by clicking the download button.
Choose the allocation you want to adjust and then click OK to download the transactions.
Now adjust the amounts in the debit and credit columns, ensuring the sum of the allocated amount is zero.
Click on Validate and then Save to Sage
The allocations have now been adjusted and saved.
If you wish to undo the allocation, you can also un-allocate the amounts. Select the allocated amounts and then right click. Now click on Unallocate.
Now save this change by clicking “Save to Sage”. Your amounts will be unallocated.
How easy was that! You can now create and adjust Sage 200 nominal reconciliations right from your spreadsheet, using Excelerator.
Where to go from here
· Contact us to discover more about the Nominal Reconciliation module and to see a live demo.
· Check out our Customer and Sales Orders Excelerator modules
· Discover How Intellerator Helps Businesses Swiftly Track Supplier Performance in Sage 200
· Email us at sales@codis.co.uk or telephone us on 020 88 610 610 to discover more
· For support on installation, email us at support@codis.co.uk or call us on 020 88 610 610


