
Import Customers from Excel to Sage 200
This tutorial is part of a series of tutorials on Excel to Sage 200 integration using the popular Excel add-in: Excelerator.
In this tutorial, we’ll demonstrate how you can effortlessly create and maintain Sage 200 customers from
Microsoft Excel. To see this live, book a free demo.
View a video of this tutorial here:
Maintain Sage 200 customers using our spreadsheet template
You can download, browse, maintain and create new customers from the sample template in six easy steps:
Open the customer template. This is supplied with Excelerator. You can add or update a single entry at a time or multiple entries at once. In this example, we will update multiple entries. You can also create your own template using the Spreadsheet Designer, discussed below.

Log in to Excelerator. To log in, use your Windows credentials. This process will be automatic if you have Sage 200 version 2013 or later.

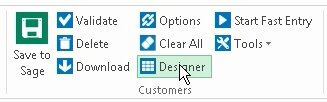
Download customers. Click on the Download button to begin.

Search customers. You can download all customers at once by clicking Add All. You can also search customers individually by using intelligent search on the top-right of the screen. To select customers to download, double click each individual item or highlight multiple items and click Add Selected. Here, we will download two customers we want to update. Click OK to download the items to the spreadsheet.

Your customers are now in Excel, ready for editing.

Make your changes. All standard Excel functionality is available to you, such as formulae, graphs, pivot tables, flash fill, auto sums etc.
Add new customers by simply adding new data to the Excel sheet. To browse what data can be entered into a certain field, right click on the cell you wish to edit and select Browse Records. You will then see a list of valid options to choose from.

In this example, we will change the Contact First Name for one record and add a telephone number for another record:

Click Save to Sage to have your customers automatically validated and saved to Sage 200. To validate without saving, click Validate. When your data is validated by either of these two methods, any errors along with their locations in the spreadsheet will be displayed to you.
Custom spreadsheet templates
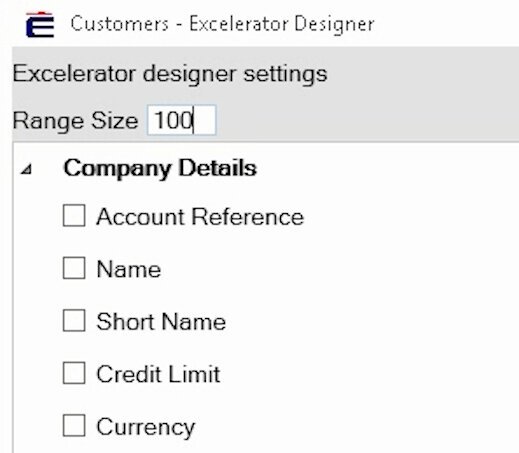
Want to download customers into your existing spreadsheets? The spreadsheet designer is for you. To see the spreadsheet designer live, book a free demo.
The spreadsheet designer will allow you to choose exactly which Sage 200 customer fields you would like to download, and exactly which cells in Excel they will be downloaded into. All standard fields for Sage 200 customers are available to you, including (but not limited to):
Account Code
Name
Short Name
Credit Limit
Contact fields for multiple contacts
Analysis Codes
Attachments
Memos
Payment terms and early settlement discount
To see the full list of fields, contact us for a live demo.
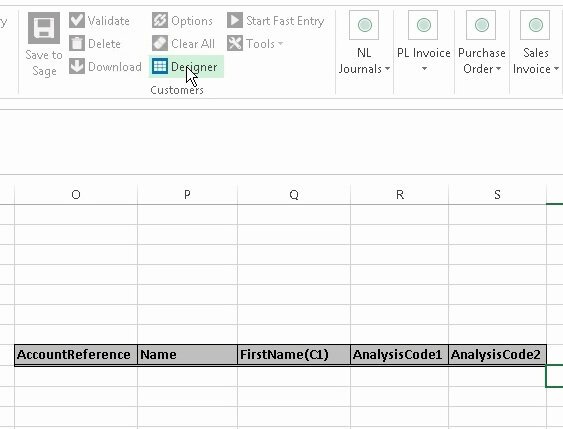
Open the designer. To begin creating your template, select the Designer button on the Excel ribbon.
Input the number of rows you require. Don’t worry if you enter more rows than you need.
Select the cell(s) that will be used. Select the cell in which you would like the first row to appear. The column title will automatically be added above this cell.

Link the cell(s) to a field. To do this, tick the desired field in the designer.

In this example, we’ll select the fields Account Reference, Name, Contact First Name, Analysis Code 1 and Analysis Code 2. We will also download all customers currently in Sage.
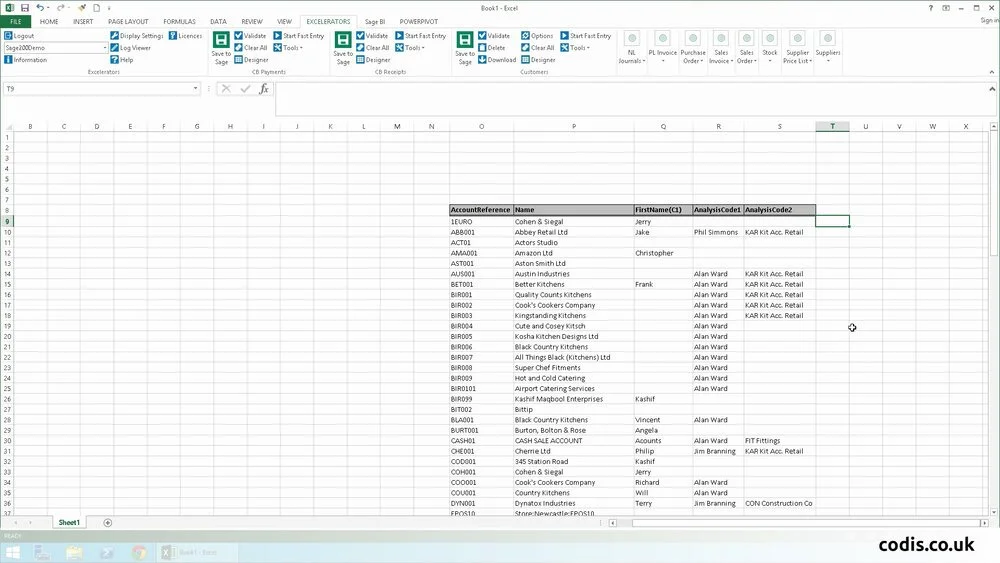
We want to change all records that have “Alan Ward” as the Account Manager under Analysis Code 1 to a new Account Manager. Using Excel’s filter, we can show records that have only Alan Ward as the Account Manager.

We can right-click on one record’s Analysis Code field and select Browse Records.

We can now search for the new Account Manager. In this case, it is Susan Maye.

Since the account manager will be the same for all records, we can copy down the name.

Exit the designer. When you have finished adding the required fields click the Designer button to close the designer.
And there you have it, your own custom spreadsheet template ready to download, edit, create and browse on Sage 200 customers.
Where to go from here
Download the latest release of Excelerator now.
View Excelerator in action with our tutorials.
For help with Excelerator, check out our online Excelerator Help.
Contact us to find out more about this new update, see a demo, or learn about upgrades.